Key Points:
- A damaged shipping container door seal gasket can allow water, dust, pests, and outside air to enter the container, leading to costly damage and reduced protection.
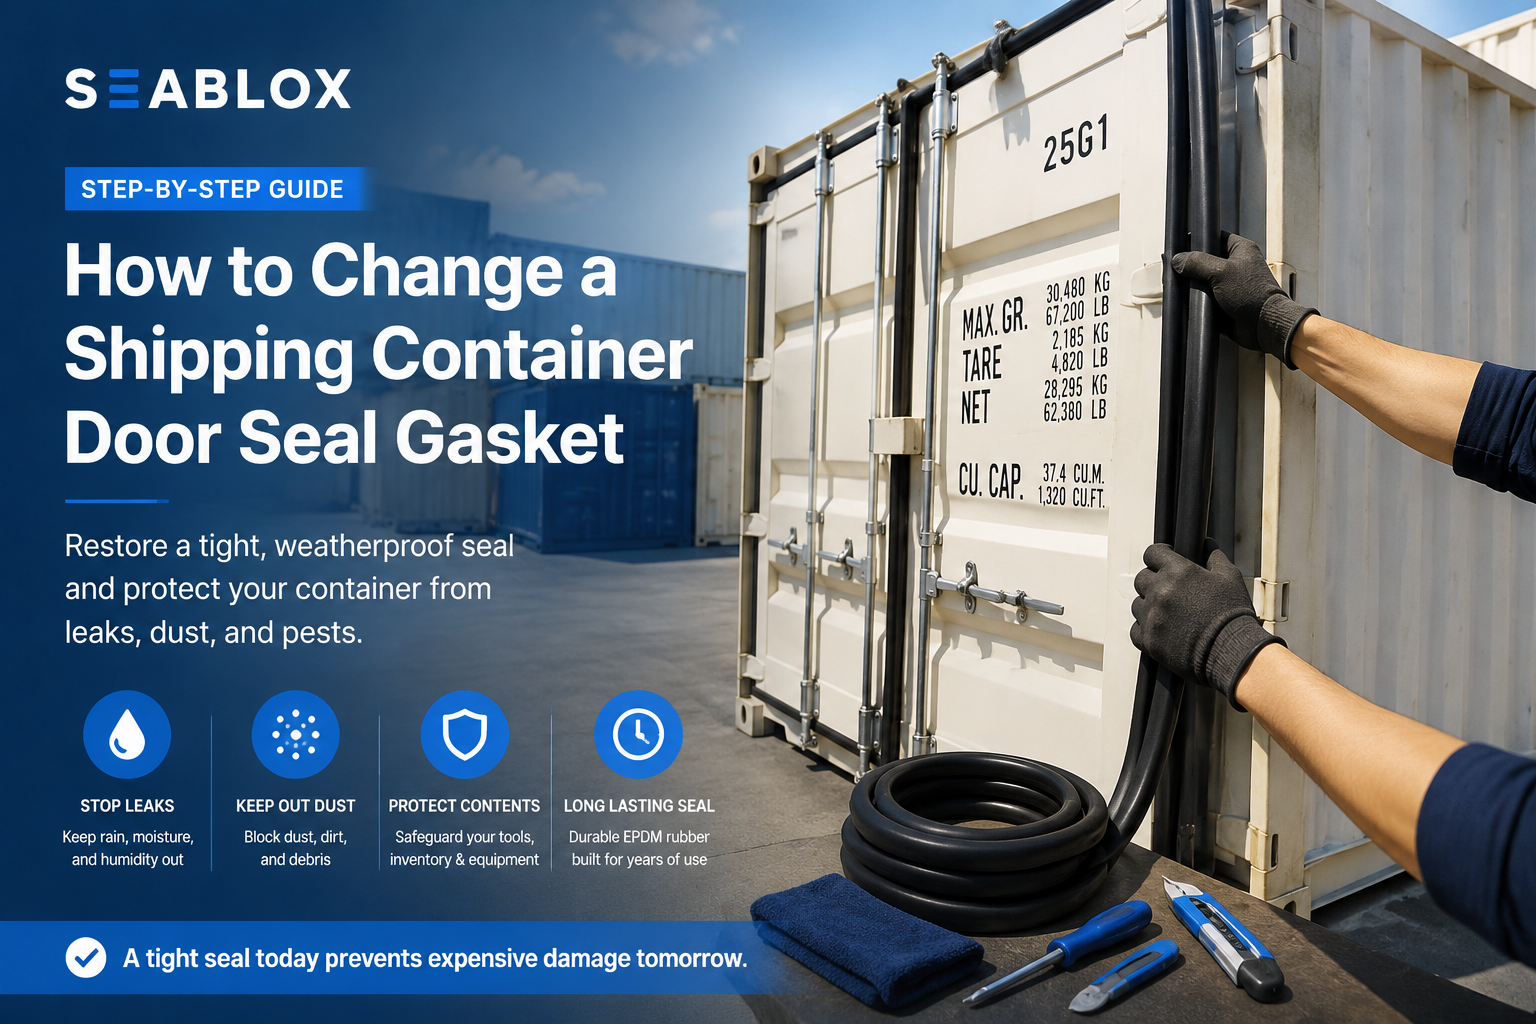
- The fastest way to restore a weatherproof seal is to replace worn gaskets with a complete shipping container door seal kit designed for your container type.
- Most container door gaskets fail due to UV exposure, moisture, temperature changes, and years of repeated door operation.
- High-quality EPDM rubber gaskets provide superior flexibility, weather resistance, and long-term sealing performance compared to lower-grade materials.
- Choosing the correct gasket configuration, including 3-sided and 4-sided door seals for standard or high cube containers, is essential for a proper fit and reliable protection.
If you’ve noticed water inside your shipping container after a rainstorm, difficulty closing the doors, visible cracks in the rubber seal, or increasing amounts of dust entering the container, there’s a good chance the door gasket is no longer performing as intended. While shipping containers are designed to withstand harsh weather conditions, the door seal gasket is one of the few components that naturally wears over time. Once the gasket begins to crack, harden, shrink, or separate from the door frame, the container can quickly lose its weatherproof integrity.
Many container owners underestimate the importance of a properly functioning door seal. In reality, a damaged gasket can lead to much more than a minor leak. Moisture intrusion can damage stored equipment, inventory, tools, furniture, and other valuable contents. Small openings may also allow dust, insects, rodents, and humid outside air to enter the container, creating problems that become more expensive to address the longer they are ignored.
The good news is that replacing a shipping container door seal gasket is often much easier and more affordable than many people expect. In most cases, installing a complete shipping container door seal kit can restore the container’s original weatherproof performance without requiring major repairs or specialized equipment. The key is identifying gasket failure early and selecting a high-quality replacement designed to withstand years of exposure to sun, rain, temperature fluctuations, and frequent door use.
In this guide, we’ll explain how to change a shipping container door seal gasket, how to identify signs of gasket failure, what tools and materials you’ll need, and how to choose the right replacement kit for your container. Whether you’re maintaining a storage container, shipping container office, workshop, or modified container structure, this step-by-step guide will help you restore a tight, reliable seal and protect your investment for years to come.
Signs Your Shipping Container Door Seal Gasket Needs Replacement
Before replacing a shipping container door seal gasket, it’s important to recognize the warning signs of gasket failure. Many container owners don’t notice a problem until water begins entering the container or the doors become difficult to close properly. However, damaged gaskets often show visible signs of wear long before serious issues develop. Identifying these problems early can help prevent cargo damage, moisture buildup, and costly repairs.
Common signs that a shipping container door seal gasket should be replaced include:
- Visible cracks, splits, or tears in the rubber.
- Hardened or brittle gasket material.
- Sections of the gasket pulling away from the door frame.
- Water leaks during rainstorms.
- Dust or debris entering the container.
- Increased difficulty closing or sealing the doors.
- Evidence of insects, rodents, or pests entering the container.
- Daylight visible through gaps around the doors.
TIP: If you can see light around the edges of a closed container door, the gasket is no longer providing a proper weatherproof seal and should be inspected immediately.
Even small gasket failures can become major problems over time. A minor leak today can eventually lead to rust, mold, damaged inventory, or structural deterioration. Replacing a worn shipping container door seal gasket as soon as signs of failure appear is often far less expensive than repairing the damage caused by ongoing water intrusion.
Tools and Materials Needed for a Shipping Container Door Gasket Replacement
One reason shipping container door gasket replacement is a popular maintenance project is that it can often be completed without specialized equipment. Having the right tools and materials prepared before starting the job helps ensure a smoother installation process and reduces downtime for your container.
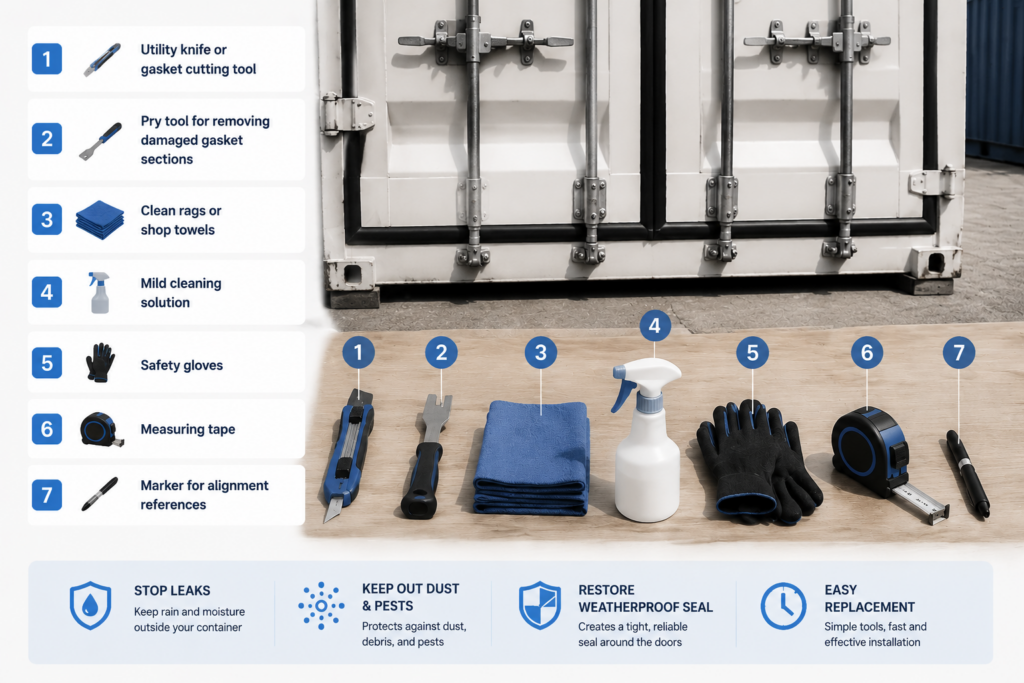
Before beginning the replacement, gather the following items:
- Replacement shipping container door seal kit.
- Utility knife or gasket cutting tool.
- Pry tool for removing damaged gasket sections.
- Clean rags or shop towels.
- Mild cleaning solution.
- Safety gloves.
- Measuring tape.
- Marker for alignment references.
TIP: Before installing a new gasket, thoroughly clean the gasket channel and surrounding surfaces. Dirt, debris, and old rubber residue can prevent the new seal from seating correctly.
Using a complete shipping container door seal kit is usually the most effective approach because all gasket sections are designed to work together and provide consistent sealing performance. Choosing a high-quality EPDM rubber replacement also helps ensure long-term flexibility, weather resistance, and protection against future leaks.
How to Remove an Old Shipping Container Door Seal Gasket
Removing the old gasket is one of the most important steps in the replacement process. A new shipping container door seal gasket can only perform properly if the old material is completely removed and the mounting surface is clean. While older gaskets may come off easily, seals that have been exposed to years of sunlight, moisture, and temperature fluctuations can become brittle and difficult to remove.
When removing an old container door seal gasket, follow these steps:
- Open the container doors fully and secure them in place.
- Inspect the gasket and identify damaged sections.
- Carefully pull the gasket away from the mounting channel.
- Use a utility knife if necessary to cut stubborn sections.
- Remove all remaining pieces of rubber from the channel.
- Inspect the mounting area for rust, damage, or debris.
- Clean the entire gasket channel before installation.
TIP: Avoid rushing this step. Even small pieces of old rubber left behind can prevent the new gasket from seating correctly and compromise the seal.
Once the old gasket has been removed, take time to inspect the door frame and sealing surfaces. Surface rust, dirt buildup, and damaged areas should be addressed before installation begins. A clean mounting surface helps ensure the new gasket provides maximum protection against water, dust, and pests.
How to Install a New Shipping Container Door Seal Kit
After the old gasket has been removed and the mounting surfaces have been cleaned, the new seal can be installed. Most shipping container door seal kits are designed for straightforward installation and do not require specialized equipment. However, careful alignment is essential to ensure a proper fit and long-lasting sealing performance.
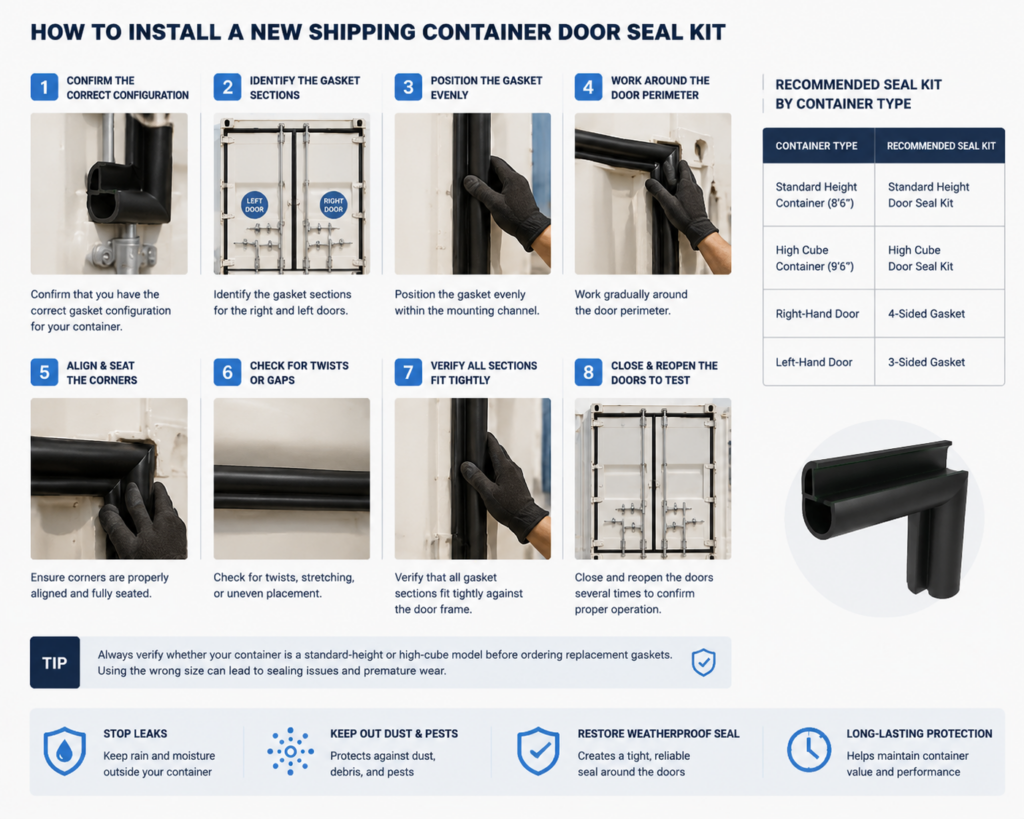
For best results, install the new shipping container door seal kit using the following process:
- Confirm that you have the correct gasket configuration for your container.
- Identify the gasket sections for the right and left doors.
- Position the gasket evenly within the mounting channel.
- Work gradually around the door perimeter.
- Ensure corners are properly aligned and fully seated.
- Check for twists, stretching, or uneven placement.
- Verify that all gasket sections fit tightly against the door frame.
- Close and reopen the doors several times to confirm proper operation.
| Container Type | Recommended Seal Kit |
| Standard Height Container (8’6″) | Standard Height Door Seal Kit |
| High Cube Container (9’6″) | High Cube Door Seal Kit |
| Right-Hand Door | 4-Sided Gasket |
| Left-Hand Door | 3-Sided Gasket |
TIP: Always verify whether your container is a standard-height or high-cube model before ordering replacement gaskets. Using the wrong size can lead to sealing issues and premature wear.
A properly installed shipping container rubber door seal gasket should create a tight, weatherproof barrier around the door opening. Once installation is complete, the doors should close smoothly while maintaining consistent contact with the gasket. This helps restore the container’s original protection against rain, dust, pests, and changing weather conditions.
What Causes Shipping Container Door Seal Gaskets to Fail
Most shipping container door seal gaskets are designed to provide years of reliable service, but no gasket lasts forever. Over time, constant exposure to environmental conditions and repeated door operation gradually reduce the gasket’s ability to maintain a tight seal. Understanding what causes gasket failure can help container owners identify problems earlier and avoid costly water damage or cargo loss.
Several factors commonly contribute to door gasket deterioration:
- Prolonged exposure to UV radiation from sunlight.
- Constant temperature fluctuations throughout the year.
- Rain, humidity, and moisture exposure.
- Frequent opening and closing of container doors.
- Physical damage caused by impacts or improper handling.
- Natural aging of the rubber material.
- Long periods of neglect without routine inspection.
TIP: Inspect your container door seals at least a few times per year, especially after severe weather events or periods of heavy use. Small cracks are often much easier and less expensive to address than a complete gasket failure.
In many cases, gasket deterioration happens gradually rather than suddenly. A seal may continue functioning even after small cracks begin to appear, making it easy to overlook developing problems. Regular inspections help identify early warning signs before leaks, pests, or moisture intrusion have an opportunity to affect the container and its contents.
Why EPDM Rubber Is the Preferred Material for Container Door Seal Kits
The performance of a shipping container door seal gasket depends heavily on the quality of the rubber used during manufacturing. While lower-grade materials may initially appear similar, they often lose flexibility more quickly when exposed to harsh outdoor conditions. This is why many modern shipping container door seal kits use EPDM rubber, a material known for its durability, elasticity, and long-term weather resistance.
EPDM rubber offers several important advantages for container applications:
- Excellent resistance to UV exposure and sunlight.
- Maintains flexibility in hot and cold climates.
- Resists cracking, shrinking, and hardening over time.
- Performs well in humid and coastal environments.
- Provides reliable sealing performance for years.
- Handles frequent door operation without excessive wear.
- Requires very little maintenance after installation.
TIP: If your container is located in a region with intense sun exposure, heavy rainfall, or large temperature swings, investing in a high-quality EPDM gasket can significantly extend replacement intervals.
Because container doors are constantly exposed to changing weather conditions, selecting the right gasket material is just as important as choosing the correct size. A durable EPDM shipping container rubber door seal gasket helps maintain a weatherproof seal, reduces maintenance requirements, and provides dependable protection against water, dust, pests, and outside air for years to come.
Common Mistakes During Shipping Container Door Gasket Replacement
Replacing a shipping container door seal gasket is a relatively straightforward project, but several common mistakes can reduce the effectiveness of the new seal and shorten its lifespan. Even a high-quality gasket may fail prematurely if it is installed incorrectly or paired with the wrong container configuration. Understanding these mistakes can help ensure a successful installation and long-lasting weather protection.
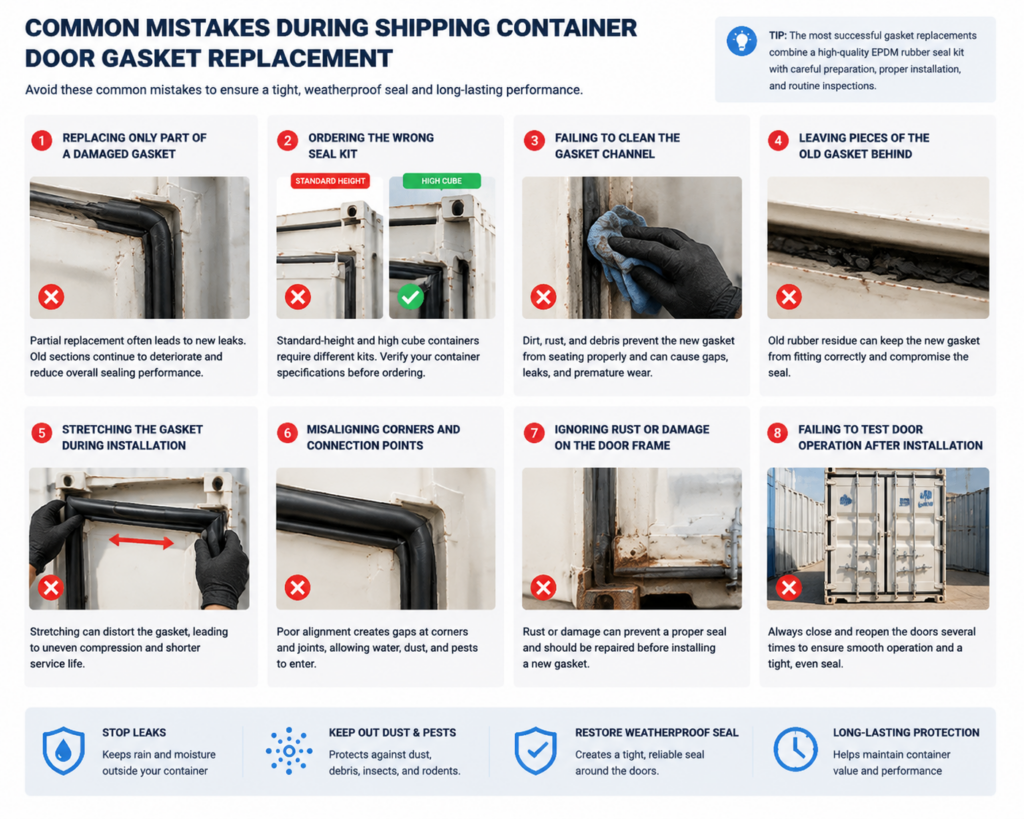
Some of the most common gasket replacement mistakes include:
- Replacing only damaged sections instead of the entire gasket system.
- Ordering the wrong seal kit for a standard or high cube container.
- Failing to clean the gasket channel before installation.
- Leaving pieces of the old gasket behind.
- Stretching the gasket during installation.
- Misaligning corners and connection points.
- Ignoring rust or damage on the door frame.
- Failing to test door operation after installation.
Replacing Only Part of a Damaged Gasket
While replacing a single damaged section may seem like a cost-saving solution, older gasket sections often continue to deteriorate shortly afterward. Installing a complete shipping container door seal kit typically provides more consistent sealing performance and better long-term reliability.
Ordering the Wrong Seal Kit
Not all shipping containers use the same gasket configuration. Standard-height and high cube containers require different seal kits, while left and right doors use different gasket layouts. Verifying your container specifications before ordering can prevent installation delays and fitment issues.
Skipping Surface Preparation
A new gasket performs best when installed on a clean mounting surface. Dirt, rust, old rubber residue, and debris can prevent the gasket from seating properly and may create gaps that allow water and dust to enter the container.
Stretching the Gasket During Installation
Pulling or stretching the gasket while installing it can lead to uneven sealing performance and premature wear. Allow the gasket to sit naturally in the mounting channel and verify alignment before completing the installation.
Ignoring Future Maintenance
Even after a successful replacement, periodic inspections remain important. Checking the gasket for wear, damage, or contamination a few times each year can help identify potential issues before they develop into leaks or costly repairs.
TIP: The most successful gasket replacements combine a high-quality EPDM rubber seal kit with careful preparation, proper installation, and routine inspections.
Avoiding these common mistakes helps ensure your new shipping container door seal gasket delivers maximum weather protection, longer service life, and dependable performance in all conditions.
Keep Your Shipping Container Protected With the Right Door Seal Kit
A properly functioning shipping container door seal gasket plays a critical role in protecting your container from water intrusion, dust, pests, and changing weather conditions. While door gaskets naturally wear over time, replacing them before major failures occur can help prevent costly damage and maintain the performance of your container for years to come.
By identifying early signs of gasket failure, using the correct tools, following proper installation procedures, and selecting a durable replacement material such as EPDM rubber, container owners can restore a tight, weatherproof seal without extensive repairs. A complete shipping container door seal kit often provides the most reliable solution because it ensures all sealing components work together as intended.
If your container doors are showing signs of leaks, cracks, or poor sealing performance, now is the perfect time to upgrade. Explore our Shipping Container Door Seal Kit options for standard and high cube containers and restore the protection, security, and weather resistance your container was designed to provide.